There's nothing like a good soak in a hot tub! This is one of the Happy Hoppers images by House Mouse and I LOVE IT! The words are quite fitting. Everyone should enjoy a good soak now and then. This card was colored with Staedtler watercolor pencils and a Dove blender pen. The border punch is by EK Success and the striped paper is called "Transportation Stripe" by The Paper Company.
Friday, July 30, 2010
Wednesday, July 28, 2010
VIVA Decor pearls...made from pens
Several of you have asked me about the "pearl pens" from Viva Decor and if I would be carrying them in the store. I had remembered seeing this company at the winter CHA show in Anaheim, but did not see anything done there that really applied to stamping at the time. Then someone apparently got a hold of some of their products and discovered the WONDERFUL "pearl pens" and how you can make paint pearls with them that are amazing! The trickiest thing with these pens is that you can currently only get them direct from the manufacturer. They are at this CHA show and I stopped by the booth yesterday to check them out and get ordering information. In the picture, I took 2 products - the "Paper Pen," which seems to be a pearl pen made more for paper products and one of the "Glass Effect Gel" and made little "pearls" on a piece of white cardstock. The Glass Effect Gel pieces are red in the picture and they make glossy little beads. As you can see, they made wonderful little "pearls" that you can add to anything. They dry in 15-20 minutes or so and don't leave the little peaks that we have seen with other products. They level right down to a perfect little bead and dry that way. I intentionally made beads of different sizes to see how easy it was to control the size and it was pretty simple. I am placing an order today and cannot wait to get them into the store. They come in a wide range of pearly colors and metallic colors.
Tuesday, July 27, 2010
Introducing...The GRAND CALIBUR!!!!
Remember - size really does matter and this is Spellbinders NEW machine - the GRAND CALIBUR! It is BIG. The tray measures 8-1/4" across and it will cut and emboss all your existing Spellbinders dies, along with the NEW Grand Nestabilities! So, you you need something BIG, and I mean BIG, the new dies will do the job! They are in the same shapes as some of the existing labels and nestie die sets and continue that progression! They are perfect for scrapbooking, as well as shaped flat cards and items like invitations and announcements. They are all scheduled to arrive in the beginning of October, so stand by!
Jeannette
Sunday, July 25, 2010
BIG news coming from Spellbinders!
I can't tell you yet - but will be able to soon! I just saw the "other" new product from Spellbinders! I promised them that I would not reveal it until the show officially opens, but it is BIG! Think BIG!!!
There are also some Nestabilities, Shapeabilities and other dies that are new, that were not shown in the blog hop, that are also being released the show.
So, stay tuned - and think BIG!!!
Thanks for stopping by!
Jeannette
Jeannette
Saturday, July 24, 2010
Pink Blossoms Card
Another Outlines blossom card - this one in PINK! In this card, we used a lot of the BoBunny LoveShack line of papers and the "tips" of the blossom stamps are colored with a bright pink Tombow marker to add a little sharpness to the ends of the petals. The large swirl on the card base is a HUGE stamp from Outlines, as well. We stamped it with Wild Rose Ranger Adirondack dye ink. The leaves on this card are stamped with black Stazon ink on green vellum. A quick trick with vellum. Colored vellum is not available in a good color range, BUT... you can alter the color easily with your Copic markers! However, you need to add the color to the back side of the vellum - NOT the side you stamp on. Why? Both Copic markers and Stazon ink alcohol based. This means that they will make each other bleed. So, you can apply the Copic color to the back. I stamp the image first and make sure the ink has completely dried. I then add the color to the back side of the vellum - and only where I need it - so as not to waste my Copic ink on sections that are getting cut off. The Copics work so well because they dry almost instantly and they level out their color with less streaking. Give it a try - I think you will like the results.
Wednesday, July 21, 2010
Surfing Riley
Yep, we're still having a heat wave here in New Hampshire. I created this fun card with Riley the Moose on his surfboard. The card base is from The Paper Cut and is known as a "bib card." I stamped a paisley background image from Impression Obsession with Ranger Distress ink in Broken China. Riley is colored with Staedtler watercolor pencils.
Tuesday, July 20, 2010
Day 8 - Final Day for Spellbinders Release Party!
Monday, July 19, 2010
Spellbinders New Releases - Day #7
We're down to the second to last day of the Spellbinders New Release Party and Blog hop! Today they are introducing another nested set called Wonky Squares, which I think will be great for card-making! I can already imagine some stamp images that will work well in these squares. The second items to be released today is a shape set called Nested Hearts. These could add some elegance to a stamp or craft project.
Tomorrow is the last day of the blog hop for the new releases. In the past, Spellbinders has always had a few items "up their sleeve" for the show that they have not previously shown in the blog hop, so be sure to stand by after the show opens. I have also updated the Stamped Designs website with the pictures of the new releases on the Spellbinders page. Be sure to check them all out!
Sunday, July 18, 2010
Dunking your toes in the water...
I don't know what the weather is like where you are, but it is WAY too hot here in the Northeast! When the temperatures get into the 90's for multiple days in NH, you know it must be cooking in other places. So, in an effort to think about cooler days, I did this card with Tilda dipping her toes in the water off a dock. She's colored with Copic markers and the little dots on her swimsuit were colored with a red Prismacolor pencil. I used a large Tsukineko dauber and Ranger Distress ink in Tumbled Glass to go around the edge of the circle cut with a Spellbinders circle die. I placed a mask over Tilda's head and feet when I added the blue. It makes for a nice cool image on a hot, hot day!
Thanks for stopping by! And stay cool!
Jeannette
Jeannette
Spellbinders New Releases - Day #6
We're at Day #6 of the Spellbinders Release Party of their new dies to be released at the Summer CHA show! Only 2 more days to go! Today they are releasing some holiday "nesties" - which include a newly designed tree and mittens! They are also introducing another "Labels" set - we're up to Labels 15 now! With the dies scheduled to ship in August, you will all have plenty of time to incorporate these designs into your holiday projects.
Saturday, July 17, 2010
Memory Box Classes at Stamped Designs
On Thursday July 15th, Stamped Designs was fortunate to have Dave Brethauer from Memory Box come and teach 2 different class - one on colored pencils and one on watercolor techniques. Dave is a wonderful teacher and everyone learned from his experience and willingness to share all those "pearls of wisdom" that he has learned along the way.
These are the cards that were made in the 2 different classes. All of the images are new holiday images by Memory Box.
Thanks to everyone for coming and making the classes a success and a very special thanks to Dave for putting us on the list of stores he visited this summer. I have received a lot of emails from people who took the class - all commenting on how much they learned and enjoyed themselves.
Day 5 of the Spellbinders Preview
I'm very excited to see this morning's release by Spellbinders. If any of you have tried to create a diamond layer on a card, you know how tricky it is to do! In fact, a Stamped Designs' customer commented on just this issue last year and I told (okay begged) Spellbinders to consider making a nested set of diamonds. Guess what? They listened! Now, I may not have been the only one that suggested this to Spellbinders, but, nonetheless, we will have a diamond set soon! The are also introducing 2 shape sets today - called Antiquities and Fallen Angel.
Friday, July 16, 2010
Spellbinders Blog Hop Day #4
WOW! That is all I can say about today's new dies being previewed by Spellbinders. I just love, love, love the beaded ovals set! Can't wait to get my hands on them. The snowflake pendant set is also beautiful with a lot of possibilities.
I am starting to get some eamils for orders. PLEASE let me know if there are any you want to order. That ensures that I order enough and that you get them as soon as they come in. The good thing is that Spellbinders is a Crafter's Home vendor and we get to place our orders a couple days before the show starts, which puts our orders at the front of the line.
Thursday, July 15, 2010
Spellbinders Blog Hop Day #3
Today's Spellbinders preview shows some new dies for their Presto Punch. I know, we're still waiting for those to be delivered (they are undergoing Underwriter's Laboratory testing now), but the dies can also be used in the personal die cutting machines we all know and love. So today they are previewing a set of scalloped squares and circles, a set of small holiday designs and a set of fleur-de-lis. These dies also allow you to cut and emboss the image, just like the big dies.
Wednesday, July 14, 2010
Spellbinders Blog Hop Day #2!
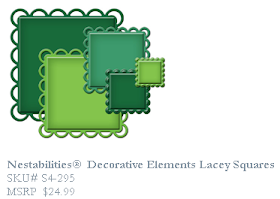
It's day #2 of the Spellbinders blog hop for the new items they are releasing this summer! The two items being shown today are the Graveyard scenes and shapes and Nestabilities Decorative Elements Lacey Squares. I just LOVE those lacey squares! Can't wait to start creating with those. Once again, Spellbinders has come out with some innovative designs to help us create even more beautiful cards and other projects.
Tuesday, July 13, 2010
Spellbinders Release Party Blog Hop is ON!
Today is the first day of the Spellbinders New Release blog hop! This is where they showcase some of the new items that they will be releasing at the Summer CHA Show at the end of the month. These are the 2 die sets that they are revealing today. You can follow the release on Spellbinders blog, where they will direct you to various design team members' personal blogs to see what they have created with the new dies. Check out the blog at:
www.spellbinderspaperarts.com/blog
Monday, July 12, 2010
Another Outlines Blossom Card...
I just love these new blossom stamps from Outlines! You can layer them in almost any combination and they all look great! This one uses vellum for the petals and leaves. Given the fact that colored vellum can be hard to find, I used my Copics to alter the color of some colored vellum that was not quite what I wanted. The ink dried quickly and has almost zero streaking. Another great use for the Copics! The edges of the flower petals have ultrafine glitter on them to given them a little sparkle. The center of the flower is one of the little "word centers" available. The glitz on the center is dots of Ranger's Stickles glitter glue! A very economical way to add a little bling!
Friday, July 9, 2010
BRAND NEW JustRite Stampers!
Ah, there's nothing like the sight of boxes coming off the UPS truck full of stamping goodies. Today we got some of the new holiday images from JustRite Stampers. This is the first of two holiday releases from JustRite. The second is due out in August. We have:
Double Resist!
This card was make with the "double-resist" technique. We all know about resist - which is basically keeping the coloring from dying the cardstock. You can create the effect by inking a stamp with a clear ink like Versamark and then apply the ink over the top - which gives a softer effect. Or, you can stamp and emboss with clear ink and powder and that will totally resist the color and show the white. Double resist is using both techniques. Simple to do, you just need to follow the correct order. First do the "stamp and emboss" one. Let the heated powder dry and cool, then do the VersaMark style right over the embossed images. Now when you add the color (in this case I sprayed with Glimmer Mist), the images embossed show through pure white and the ones done with the VersaMark are a pale pink. It's really 2 great effects in one! I used Hero Arts images on the resist piece and the flower image is from Penny Black.
Have a great weekend!
Jeannette
Wednesday, July 7, 2010
Chef Tilda!
Who can resist little Chef Tilda sitting on a rolling pin waiting to cook up some delicious treats? I did a little "mixed media" in coloring this one. I used Copics for her face and did the rest of the coloring of Tilda with Prismacolor pencils. The rolling pin is colored with Copics except for the plaid ribbon. I can sometimes get better control on something like irregular lines with a pencil vice a marker. There are no rules in stamping. No one says you have to color everything with the same media. Sometimes I do a base coat with Copics and then add some dimension with colored pencils. The possibilities are endless!
Monday, July 5, 2010
Fun Blossom Cards with Outlines Stamps!
Happy 4th of July weekend everyone! I hope everybody is enjoying their holiday weekend! We've had incredible weather this weekend - sunny and HOT! Sure beats last year, when we had cold and rain. I had hopes of getting a patriotic card done yesterday, but that did not work out as I needed to get the samples finished for this week's classes. This is one of the cards for an Outlines Blossoms card class and I just LOVE these stamps! Outlines started offering cling mount stamps this year, which is GREAT because it saves on cost and storage space. This card was made by stamping the various flower elements on some different BoBunny papers (a lot of the "Love Shack" collection and some of the double dots). The flowers are made by layering the pieces together using 3M foam tape in between the layers. You add dimension to each flower by bending and shaping the petals before putting the layers together.
Thanks for stopping by!
Jeannette
Friday, July 2, 2010
Happy mail!
Who doesn't like to get a hand-stamped card in the mail? We're all hooked on e-mail, but there is nothing like an old-fashioned card to perk someone up. Certainly more fun than a monthly bill! This is one of the "Pure Innocence" stamps from My Favorite Things. She's stamped on a Spellbinders cut-out piece and colored with Copic markers. A little fancy layering and you're done! Perfect card to send.
Happy Friday everyone!